Search This Blog

Tuesday, December 18, 2012

Latkes and Pak Choi

Well, it has been a while, just haven't been at the cooking thing enough lately. But, it is the holiday season, and where I grew up, this was always a mix of kids doing Hanukkah, Christmas and home cooking. One of the funny things that always struck me was the tradition that some Jewish families had, of going out for Chinese dinner on Christmas day. This dish, is an quirky way, is a synthesis of that fascination. Yes, the latke meets the wok.


The Latke...
I like to use an old recipe, that I found in an old issue of Bon Appetit, back when it was all about cooking. This recipe is long since altered beyond attirbution, plus, I have no idea the cook who wtote it down. I use a Microplane box grater now, which gives me wide strips of potato and a weird chunky mush of onion, which works curiously well. Anyways...

4 parts grated ribbons of potato
1 part grated onion chunky mush
1/2 part binder (properly, matzo meal, improperly, panko)
1 medium egg

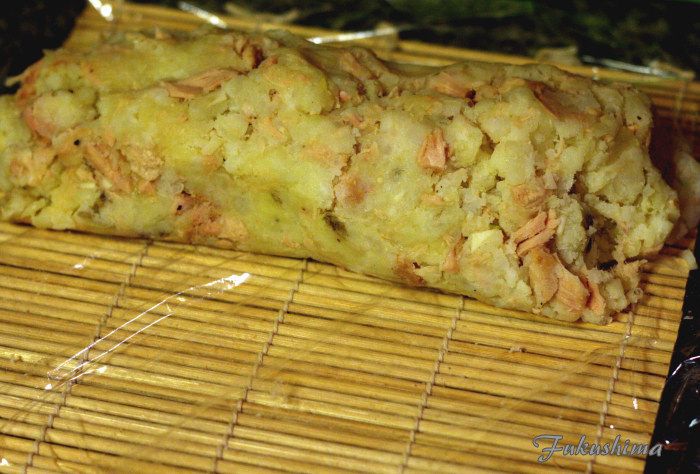
Create a salty water bath, enough to cover the potatoes you are cooking. It should taste like pasta water. Grate potatoes into the brine and let sit for 15 minutes. Place in salad spinner and work until dry. Alternately, you can place the potatoes into a dish towel and wring it until dry. Immediately wash the towel or the starch will stain it lavender and gray, and not a pretty lavender and gray. Mix the next three ingredients with the now dry potatoes to make the 'batter'. It will be stiff.

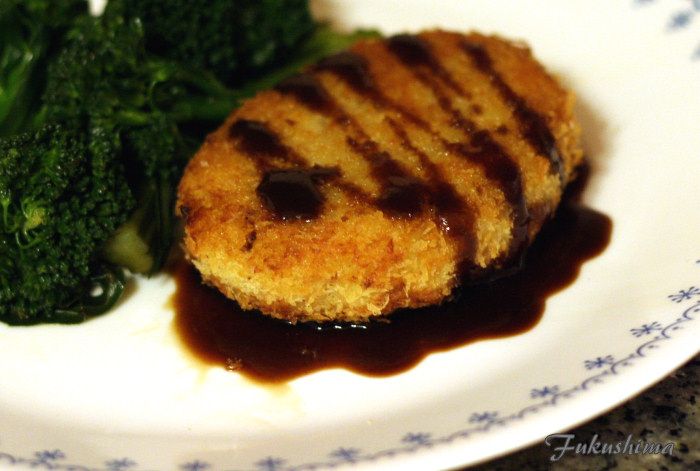
Fry in 325F to 345F oil one each side, they should be golden brown and crisped. Since I prefer to shallow fry, I make then the 'batter' into balls then flatten once in the oil. Hold in a 300F oven while you finish the cooking.

The Pak Choi...
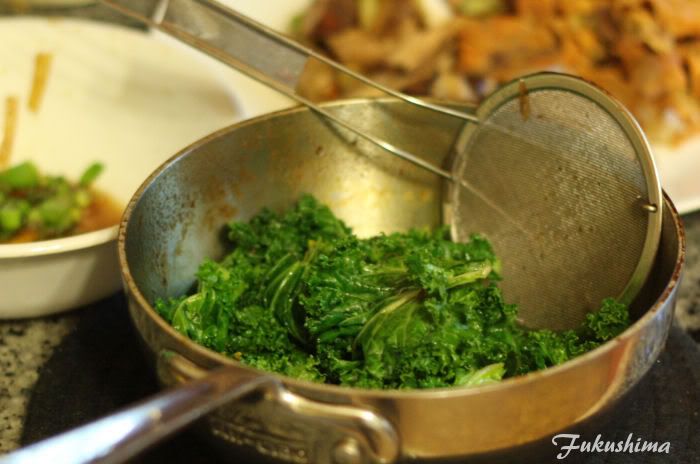
I like to use baby pak choi for this dish. By pak choi, I mean the ones with the white stems and dark green leafs. I wash and separate the stems from the leaves. I julienne the stems and set aside. The leaves are torn such that they are mostly the same size. Set these aside.

I use just a few slivers of yellow onion, sliced very thin, these need to be thin to cook fast. I also prepare shiitake mushrooms, for this dish, I wanted to use fresh mushrooms, as what I was looking for was the more delicate flavor and softer texture of small, fresh shiitake. Dried or larger ones are a little tougher and offer a stronger flavor, it is a tradeoff. Anyways...

6 to 8 baby Pak Choi, washed, stems reserved, ends trimmed
4 slices shaved from medium yellow onion
8 to 10 baby or small fresh shiitake, stemmed, washed

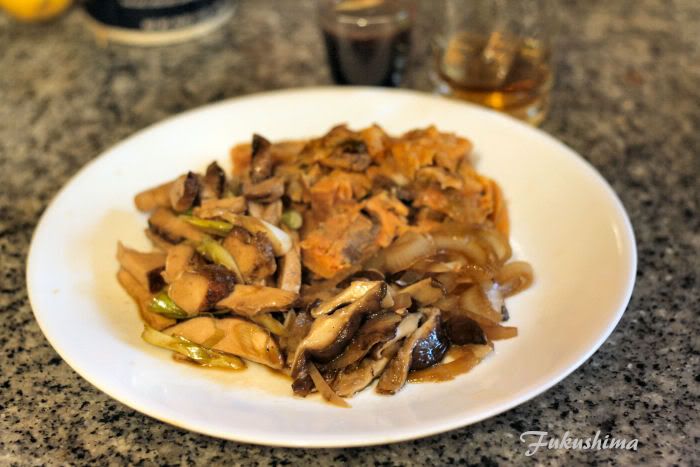
In a hot wok, add 2 tablespoons high heat oil (I used grapeseed) and coat wok, toss in julienned stems of pak choi, toss until wilted, add onion and mushroom, toss until onions melt and shiitake are cooked (around 3 to 4 minutes, unless you have a wok burner) toss in green parts of the Pak Choi and toss, adding 2 tablespoons of fish sauce and a little hot sesame oil. Toss for a minute and remove from wok.

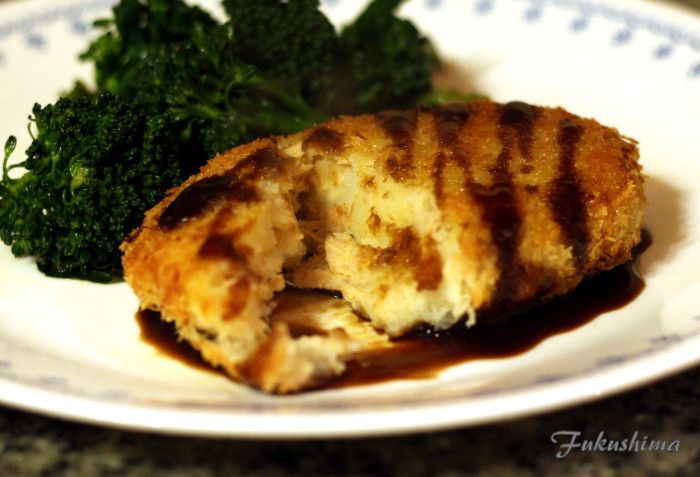
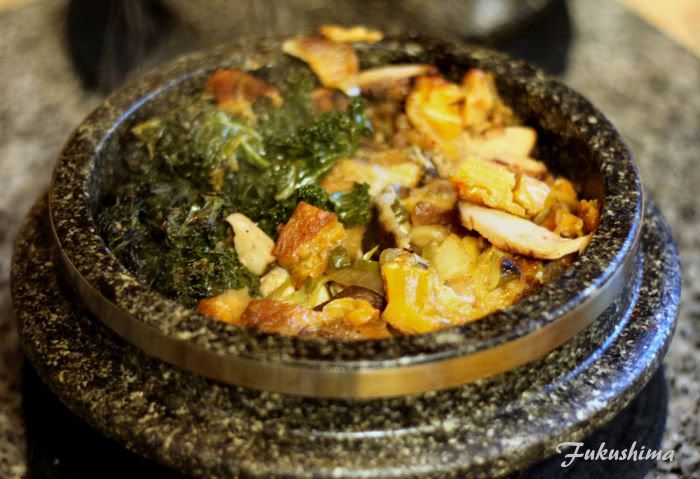
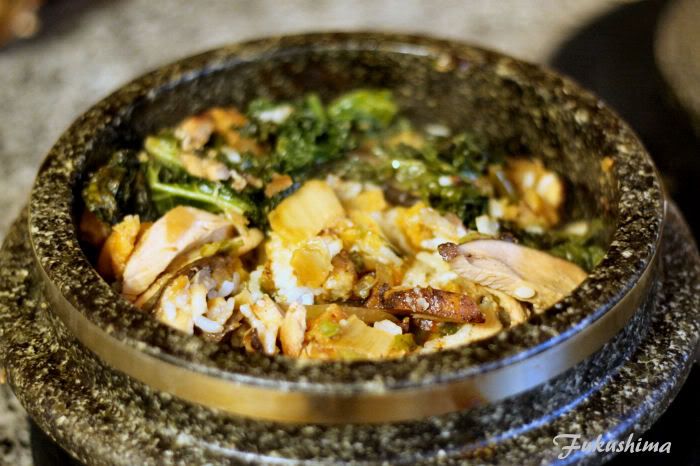
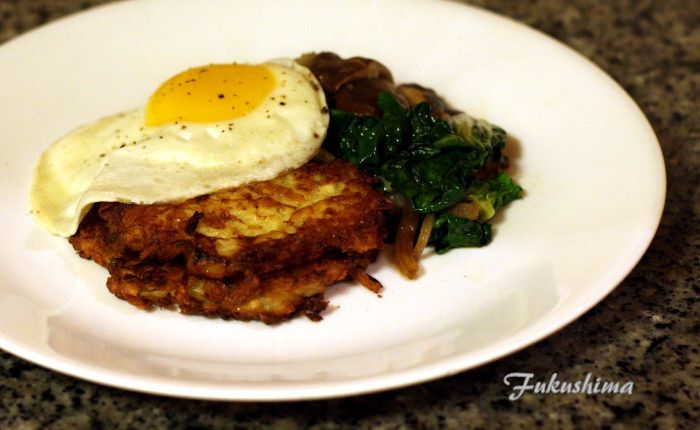
Plate latkes, place greens alongside, or on top, but, that ruins the crispy latke. Then top with a fried egg. I added a little Tonkatsu Sauce, cause I love the stuff.


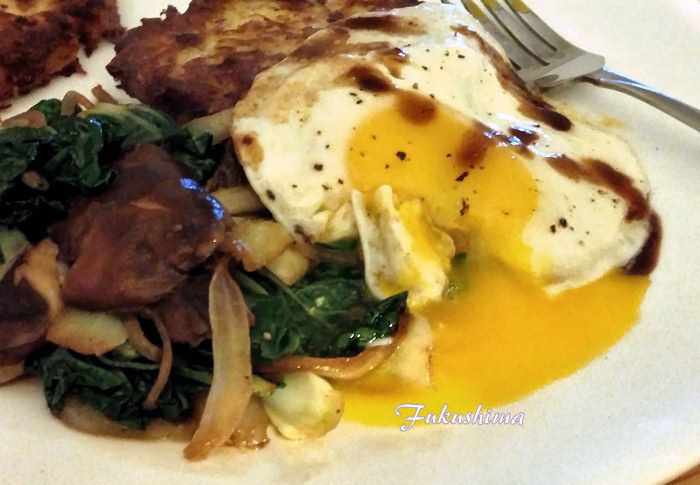
It was an excellent combination. The egg was probably overkill, but, added a richness and moisture and who doesn't love a fried egg? The vegetal and savory nature of the pak choi and soft texture of the mushrooms and egg worked beautifully to contrast the crispy latkes.

Sunday, December 2, 2012

Croquettes

I was browsing the produce aisle at one of my favorite markets, and chanced upon two ingredients that really shined, one was baby broccoli and the other were these great looking organic Russet potatoes. A note on that, in general, if I am cooking, I really work at buying roots and tubers that are organic, I feel that in particular, these crops benefit from the practices that small organic farmers provide for these crops. These Russets looked so good, it was clearly time for croquettes.

The Japanese love croquettes, and these are the types that I love to make. Typically aromatics and vegetables support a meat, blended into the mashed potatoes and then panko-coated and deep fried.These have finely chopped onions, finely minced garlic, and some line caught albacore tune. I prefer the taste of albacore, and smaller line caught tuna offer benefits of lower mercury and lower impact on fisheries. I also added an egg for binding.

Potato mixture on Sushi-su

The potato mash was prepared, and I added a little butter, fine sea salt and ground pepper, the potato has to taste good first, then everything else was added. One of the tricks I like to use to shape and make the process of breading easier is to form the potato mixture into a tube, I use my sushi-su for this, it really comes in handy for so many tasks other than rolling sushi. I then refrigerate the potato mixture to firm it up.

Rolled and chilled


Once it has gotten cold, I press it into a form, or simply mash then roll while still in the sushi-su, so that it is oval shaped. Then it is simple to slice, flour, egg wash and panko. I let the panko-coated croquettes rest so the breading will bind to the potato. This helps keep the coating attached to the potato. Once shaped and rested, the croquettes were shallow fried in grapeseed oil and canola oil, the key is to keep the oil at a moderate heat. It has to cook through the potato and heat everything while not over-browning. After frying, the croquettes are drained.

Plated with Tonkatsu sauce

I plated the croquettes with the baby broccoli, which was steamed until just soft, then chilled in a mixture of shoyu, sugar, togarashi infused toasted sesame oil and a little sherry. This is served ice cold to offset the hot, rich and aromatic croquette. A little tonkatsu sauce rounds out the plate.

The interior, buttery, aromatic


The texture of my croquettes are a little rustic, I don't like super smooth ones. The contrast of the cold greens with the hot croquettes covers so many flavors and textures, a perfect riff on a modern Japanese snack classic.

Croquettes:
4 medium Russet potatoes
1 tablespoon sweet butter
1/2 cup onion (I used a yellow onion) finely chopped (1/8:)
1 large clove garlic, minced to paste

1 can albacore tuna (I used Wild Planet Line Caught Albacore)
Fine sea salt and fresh ground black pepper to taste
1 egg

Steam potatoes until softened and easily mashed. Mash by squeezing to create a lumpy texture. Add next four ingredients and combine gently. Add flaked albacore and taste, correct for salt and pepper. It has to taste good at this point. Add 1 beaten egg, I like to add a teaspoon of water to the egg and then beat with a fork. The water helps the egg combine smoothly.

Wrap in plastic wrap, and form into a roll. Refrigerate until potato sets. Once the potato is set, roll in to form a oval tube and slice, or press into oval croquette forms. Dredge slices in flour, then brush with egg whites, and dredge in panko. Allow to sit for 15 minutes to 30 minutes.

Shallow fry in moderately hot oil until golden brown on one side, flip and finish cooking. Drain and serve.

Monday, October 29, 2012

"Carnitas", cold veggies and Rice

I am back, I got an iPhone, which, I have decided has a camera good enough to use for my blog. I loaned my usual camera out, and it is still working overtime for that purpose. Here, then is my first post with my iPhone. I also have a secondary problem, that I have not been able to use my smoker, a small issue with a neighbor that I will soon resolve. Be that as it may, I made this.

I took some boneless pork country style ribs, which we should all understand are really chunks cut from the pork shoulder butt. These were basically cooked in the manner of 'carnitas'. A little note about the quotes, I have come to find that what I have always called carnitas, pork shoulders, slowly cooked in their own rendered fat, with lots of spices and citrus, is, in fact, not everyone's idea of carnitas. A friend who is from Mexico informed me that his town cooks a whole hog, and I do mean whole, down and they use little in the way of seasoning. Yet another told me that his town always roasts a hog carcass in a large pan, allowing it to roast down and render (but not fry) in it's own juices. The things you learn by talking to people about their home town foods.

As I said, I went with pork shoulder, and chopped up a medium yellow onion, several cloves of garlic and a mix of spices, the usual suspects of kosher salt, medium grind black pepper, cayenne and chile powder (home made, thus no cumin) and some lime powder.

 Onions, garlic and spices

The onions were sauteed, then 1/2 half of the spices to toast. Once I felt the chile sting (yeah, I gauge whether the chile is toasted up by sniffing) I added the pork, a little extra beef/pork lard from an earlier cook, browned it and then added the rest of the spices, a couple of tablespoons of fish sauce and the garlic. The whole thing was sealed up in the cast iron Dutch oven.

Nice pork chunks

Into the oven at 325F for 3 hours or so. I open the oven and listen for sizzling and smell for a little caramelization, if I get it, then it is ready to remove and let sit for 30 minutes. Timing varies. This could totally be done on the smoker, if I had it available to me. Much like my BBQ, I like to let the whole thing rest for at least 30 minutes, I believe this aids in making the meat taste and texture better.

Fresh from the Cooker

Anyway, open it up, take a look and see that there is a lot of great color, the onions have cooked down and all of the liquid, other than fat, has been burned off. We are good to go. Some barely steamed then chilled veggies and a little rice (my preferred rice is Japanese rice) and dinner is served.

Dinner, loved the pork and cold veggies

This is not quite as crunchy as if it was carefully fried in lard in a large copper cauldron, but, it took a lot less attention, during which I was able to get some work done. The flavors are simple and the pork shines through. Very subtle spicing, which is what I am more enamored of these days. The cold vegetables add a wonderful counterpoint to the sweet, earth, salty pork and soft rice, this meal hits a little on every texture and flavor.

Friday, September 7, 2012

Tartar Sauce

Okay Rachel, this is for you. I do have a few variations on tartar sauce, the major thing being home made versus store bought. I prefer making tartar sauce from scratch in terms of consistency of the sauce and overall control in ingredients. But, it is hard to beat the convenience of ready made mayonnaise.

Easy and Fast Tartar sauce:

3/4 cup Mayonnaise, Best Foods
1/8 cup heavy cream
2 tablespoons dill pickle juice
1 teaspoon Worcestershire sauce
1 teaspoon each chopped capers and pickles
1 teaspoon finely chopped onion or shallot (shallot is better, onion is cheaper)
1/2 teaspoon finely snipped chives and parsley combined
White pepper to taste

Combine mayonnaise, cream, pickle juice and Worcestershire sauce, adjust with half of cream first to get desired texture. You want a consistency that is slightly thicker than the cream itself. Should hold to spoon when tipped.

Add in vegetables and blend. Allow to sit for 15 minutes if possible. Season with white pepper to adjust heat level. Allow to sit and chill for additional 15 minutes or more for best results.

Not at all Easy and Fast Tartar sauce:
3/4 cup home made mayonnaise
1/8 cup heavy cream
2 tablespoons dill pickle juice
1 teaspoon Worcestershire sauce
1 teaspoon each chopped capers and pickles
1 teaspoon finely chopped onion or shallot (shallot is better, onion is cheaper)
1/2 teaspoon finely snipped chives and parsley combined
White pepper to taste

Making mayonnaise:
2 extra large fresh eggs. Pastuerized eggs will work, I really prefer to get very fresh local aggs
1-3/4 cups of oil, normally I use a very good olive oil (grapeseed oil is a great choice too)
1/4 teaspoon fine salt (I use fine sea salt)
1-1/2 tablespoons lemon juice (or vinegar)
1/2 teaspoon mustard powder

Blend egg yolks thoroughly, this can be done by hand, I use a food processor (more to follow). Do something with the egg whites, you don't need them for this. Add the mustard powder. Now, you must add the oil very slowly, go too fast an it will not emulsify. Here is why I use a food processor, most of them have a pusher that has a small hole in the bottom of the pusher for the feed tube. If you fill this with half of the oil, it will trickle in at just the correct flow. If you go by hand (I will use a whisk sometimes) then you need to add a drop or two every few seconds. Once the oil is completely incorporated, add the lemon juice and salt. Taste and adjust salt.

Note: the mustard powder is not needed and some people dislike it. But, mustard powder is a great emulsifier and makes creating the egg/oil emulsion much easier.

Now, on to the Tartar Sauce...
Combine mayonnaise, cream, pickle juice and Worcestershire sauce, adjust with half of cream first to get desired texture. You want a consistency that is slightly thicker than the cream itself. Should hold to spoon when tipped.

Add in vegetables and blend. Allow to sit for 15 minutes if possible. Season with white pepper to adjust heat level. Allow to sit and chill for additional 15 minutes or more for best results.

To make this into Remoulade:
Delete the pickle juice, add champagne vinegar
Delete the pickles, double capers
Add finely chopped celery
Delete chives, add tarragon in it's place

Tuesday, September 4, 2012

Aloha Tri-tip

Now, you;'re probably wondering what about tr-tip is Pacific Rim, well, it is just that, as I used a rub from the Aloha Spice Company, their Organic Aloha Prime Steak Seasoning and Rub. I received this from a friend, Rob, who was on a visit to the islands, and as he met our friend Roy, this package came to be purchased. Now, the only two things that appear to make this Hawaiian are the fact that it is made there and that it has 'Alaea salt in it. And that is good enough for me, I have grown up with the use of 'Alaea salt as a seasoning, and steak is especially good with  it.

I had a tri-tip, a nice Choice Black Angus tri-tip in fact, and it was to be the test vehicle for this. I also decided to break out my Weber Smokey Joe Gold mini-kettle. This was a gift from my brother, and I have been meaning to run a cook on it. So, the tri-tip was liberally covered with the rub, wrapped in butcher paper and allowed to sit while I fired up the mini-kettle.

Rubbed up

From here, the kettle was filled with lump, fired up and allowed to come to temperature, which was around 225F, indeed, I would do this low-n-slow up to 115F internal, at least that was the plan. The kettle-ette was rocking in no time, I am already seeing benefits here. So the meat hit the grate.

Meat On!

So, the texture of the rub is a little coarser than I normally like, I prefer a medium grained texture and no whole spices, but, it was a gift and deserves and open mind. You can see it gets a great color and there are a lot of spices present. The kettle was closed and about 30 minutes passed, a quick flip and another 30 minutes, check internal, 100F, okay, another 10 minutes, 135F internal WTF!!! Off the kettle. No sear. How did it climb so fast? There must have been operator error here.

Meat Off! Meat Off!

Well, just in time, off to rest under a foil tent for 20 minutes. You always want to let the meat rest, a small cut like this, 20 minutes is perfect. You could go longer actually. In any event, a few slices and here it goes, a nice medium in my books. I was hoping for medium rare, but, well, operator error is what it is.

Yeah, I can eat this

There was plenty of moisture left in the meat, it tasted great, with the beef still from and center, but, the edges had a great balance of spices and salt, a very nice nip of chile and black and white pepper, this is a good rub. It was a little too coarse, but, I will use it again. Glad I have some more.

A close-up

 There is nothing easier than working with good meat in a kitchen, and this cut did not disappoint. I know many folks are tuning in to the fact that even with a Certified Black Angus label, not all Angus beef is really from true Black Angus cattle. Since the ranch this is purchased from offers registration and tracking of it's animals, the lineage is a true Angus. With great beef and a very good rub, dinner tasted great. That meat was as tender and moist at the photos look.

Sunday, September 2, 2012

Pizza-the long dough home

I made some pizza, this was all stated when people kept mentioning pizza within earshot and Facebook shot of me. Suddenly I had to have pizza. Of course, nothing is ever simple around here. Since I am terrible at keeping a sourdough starter alive, I have been playing around with preferments for dough. Not unlike a Biga, but, with a slightly longer process in my case.

It starts with 1 package of commercial bread yeast, 1 teaspoon of fine sugar and 1 cup of warm water. This is all mixed together and allowed to sit, in the bowl, open, for 4 hours. Then it is closed off and placed in the refrigerator for another 12 or so hours, I am shooting for a slight, but, controlled fermentation of the starter. At this point, the starter will have a slight aroma, but, not the strong odor of a true sour starter. I mix up 2 cups of Caputo 00 flour, 1 teaspoon of fine salt, 1.5 teaspoons of a very good olive oil and an additional 1/2 cup of warm water. This is all tossed into the mixer with a dough hook, and worked for 10 minutes. The dough should pull cleanly from the bowl. I go straight to a oiled bowl and cover with plastic wrap, then into the refrigerator for another 24 hours.

After 24 hours, sooo bubbly

It is then time to form the balls, one for a large pizza, or four for a smaller 9" pie. Let them proof for a few hours. I like to proof my dough in a pan, covered loosely with plastic wrap and in a cold oven, it adds a little stability to the process of proofing. Here is the dough for proof.

Dough balls, they look so good at this point

Once they are proofed, the balls will have spread out, this is a very soft dough, it really needs to be handled with floured hands and worked quickly. It has a lot of spring, so it is ideal for a thin roll out or pulled crust. I worked these out to about 9" or so, topped lightly and onto the kettle running as hot as it would go, with lump and apple wood. The pizzas were cooked on a cast iron pizza pan, which works great for this. I will line the top of the kettle with a little foil, this aids in browning.

Oh, and the sauce, well, everything, this is the season of plenty in California right now, so the sauce was a raw sauce of seeded and pureed organic Early Girl tomatoes, basil, Italian Parsley, a very good olive oil and a little organic garlic.

Early Girl sauce
 
This along with some great cheese, Maldon salt flakes, fresh ground pepper, makes for some great pizza. For instance...

Pizza Margherita

Sausage and Mushroom

The dough performed beautifully, had just a hint of sourness and sprang nicely in the heat, the crisp surface and tender sponge worked great. The sauce was exceptional, just cooked, it was sweet and sang of tomatoes, the herbs and cheese working just off the edges. It was just an excellent cook.

Saturday, September 1, 2012

Izakaya Yazuki and the meaning of food

I recently heard about a new restaurant, in Japanese terms it would be called an Izakaya, not really a place meant to be for eating dinner, so much as a place to grab a snack and some sake. And although it is not my norm to write restaurant reviews, as there are so many who do a better job of that, I feel that there is an interesting element to this experience, at least for me. It has to do with the role that food plays at an emotional level. To be sure, the food at Yazuki is well executed and the use of both local and Japanese ingredients is quite typical for any restaurant hitting the scene in San Francisco needs to have. But, they use nuka and koji in many of their dishes.

Koji, which is a mold, is a traditional ingredient for making fermented foods in Japan, it is one of those ingredients that defines a cuisine, you truly do not have real Japanese food without the effects of Koji and it's by products of nuka, sake and shoyu. Yazuki has chosen to focus on these ingredients and the effect they have on aroma, taste and texture. And the effect was stunning to me.

I grew up in a American household, quite typical in many ways, but, the one way were varied widely from our surrounding culture was in our food. My grandmothers used ingredients, such as nuka, miso, shoyu and sake, these ingredients informed the aromas in our kitchens. We always had preserved, femernted and pickled vegetables that were in various stages of each process. This is the food of my childhood, and I rarely taste anything like it. I taste it at Yazuki. I ordered the Tsunemono and something called Pirikara Kuri, the first taste of the Pirikara brought me great pleasure, as it was both subtle yet had a depth and complexity that is hard to explain, the food had the spice from Shichimi, a complex chili powder typical of Japanese modern cuisine and the particular texture of aged Japanese pickles, that I can only describe as barely wilted.

Pirikara Kuri

Then there was the Tsunemono, the highlight of the night for me actually. I could have eaten just this and some great rice and my night would have been made. The taste and texture of these fermented vegetables, which are left in nuka, a fermented rice bran product. Called, more properly, Nukazuke, this dish was instantly as familiar as my childhood, the aromas and textures, as well as the very vegetables were what I associated with my grandmothers kitchens. Emotionally, this hit me in the heart. I live for moments like this, were a food or drink evokes memories, that are so tangible and real, not some distant fog of memory, but, a visceral reaction. At that point, I was alone at my table, eating pickles, dead sober and having the best dining experience of my year. Perhaps many years, as I was, in a very direct way, dining with my mother and grandmothers.

Tsunemono/Nukazuke

This is the power of food to me, I have rarely seen it. I can remember only a few time, the most recent being on my 40th birthday, my dads 77th birthday, when I could not be with him. My friends Arleigh and Diane brought a bottle of wine that recalled the scents of the old California Flower Market, it tasted of the air in the market, it brought tears to my eyes. Only one other time, when I saw my dad tear up, as he ate home made Satsuma Age and he mentioned how it tasted of his mother's cooking, have I seen something as emotionally satisfying. The power of an aroma or a taste, to transcend decades, to defy age, and to bring one back to that those feelings and memories.

The final dish that had this effect, a tofu, sukui tofu, a soft, freshly made tofu, which, as a result of not being aged, is so soft, it takes the shape of the basket in which it is made, is another all to rare dish, we can buy kinugoshi tofu, which is similar but lacks the delicacy and immediancy of the freshly made tofu. Usually served with condiments, in this case a flavored shoyu, flake salt and minced herbs of ginger, scallion and garlic, this dish was something that as a child, I hated. It was just not right, but, as an adult, I find tremendous satisfaction and joy in this dish. I cannot help but be reminded of all those times I pushed it away, only to be told by my parents that someday, you will love eating it. And they were right, again.

Sukui Tofu with Condiments

 There were other dishes, all of which were very well executed and had a hallmark of the cuisine I grew up knowing as Japanese food, which is a subtlety in the flavors. Japanese cuisine in America is all too often adjusted to satisfy the much stronger flavors and textures of the American palate. The Japanese cuisine I grew up with has layers and flavors that float across the palate, but, they need to be considered. Each dish, even the tempura, which bore an amazingly delicate crust, not over every bit of the meat or vegetable, but, just enough to add a bit of crunch and flavor, the shoyu that was light and complex, even the use of green tea salt, a delicate complexity on normal salt, all spoke to a Japanese meal prepared in a Japanese manner.

A Glossary of Terms:
Shoyu - soy sauce in English
Miso - fermented bean paste
Kuri - Cucumber
Koji - a mold, one of two types of fungus used in production of sake, miso
Zuke - fermented vegetable
Tsunemono - 'pickled things', normally reserved for vinegar pickles

(and finally, sorry about the phone pics, terrible, I loaned my camera out to a friend running for office)


Wednesday, August 1, 2012

Peach Pie-Masumoto Peaches

Much like last year, I came across the opportunity to score some incredible peaches and nectarines from Masumoto Farms. Masumoto Farms in an old farm that specializes in stone fruits, and has a few old Elberta peaches and nectarines, the variety of which escapes me. No matter, here is what I stated with, by my estimation, just enough for one pie.

Peaches and Nectarines

From this point, the option to just eat them made some sense, but, these were so ripe, and I really don't react well to eating 4 pounds of peaches and nectarines in one day. I don't think they would have held for another day or two. These are fruit that are picked ripe from the tree, and they were picked on Sunday. I did the standard peeling method of dipping in boiling water for 30 seconds, then blanch in ice water and slip the skins. Then into a soaking solution of 4 cups water and 2 tablespoons lemon juice (or other suitable acid). I prepared a spiced sugar mix like this:

3/4 cup fine sugar
1/8 teaspoon each cinnamon, allspice, mace, nutmeg
1/8 teaspoon fine salt
1 teaspoon each water, whiskey and lemon juice

The peaches were dumped into this mix and allowed to macerate for one hour.

Macerating Fruit

This was to draw out some liquid from the peaches, in part to aid in cooking them, in part to get the soaking syrup for the pie filling. The juices were drained into a pan, 2 tablespoons of cornstarch were added and brought to a simmer until thickened. The peaches and nectarines were added back in and the entire mixture heated through. The peaches were about half cooked. Allowed to cool, they were ready for the crust. I used my typical Grandpa Sahara's pie crust, and decided on a lattice top. One thing I always do is coat the inside of the bottom crust with a egg and cream wash, which keeps the bottom crust dry and non-leaking.

A short while later, well, okay, an hour later...

Whole Pie

After an initial bake at 450F for 10 minutes, and then another 45 minutes or so at 350F (I tend not to time, I check at 30 minutes for done and make a decision at that point). The peaches will be done no matter what as they were precooked. A pie like this needs to cook almost completely, Since I do not own a pie safe, I cover it lightly with a cotton cloth and let it sit for 2 hours at least. Here, with a little whipped cream lightly sweetened with agave syrup (much easier to whip cream using an invert syrup) is my Peach and Nectarine Bourbon Pie.

Yes, that is enough for one

In final review, the taste was right there, a great pie, the peaches shine through, with just enough complexity to add to the flavor. It is concievable that I would forgoe some of the spices, just to let the peaches shine a bit more. Appearance wise, the overall lattice and liquid was detracitng for me, I was not careful enough with making the lattice. But, it eats just fine.

Tuesday, June 5, 2012

Smoked Pork 'Carnitas'-style

So, on Sunday, I cooked up a load of meat, including two pork butts that I was able to score at the local wholesale distributor. One of these cooked up perfectly within my time constraints, the other was more stubborn. I pulled it before it was ready. Thus it came about, that I had a not-quite-ready to pull butt. What to do...

Pork Butts and Ribs

I decided to make a 'Carnitas'-style dish, I love carnitas, the traditional Mexican dish, of slow cooked pork that is rendered and cooked in it's own fat. I like the use of smoked pork as a riff on this, as it adds another dimension to the meat. I took the stubborn butt, chunked it up. I also prepared some lime, orange, garlic, jalapeno and onion. I briefly sauteed the these vegetables and fruit, then added the pork. I ended up adding a little extra peanut oil to get the rendering started.

Fruit and Vegetables

I then added the chunked up pork, note that I used cast iron, I just don't believe there is a better material or type of pan for this kind of cooking. The chunks were slowly fried and they continued to render into the pan. This results in additional caramelization as well as the added depth of flavor from the fruits and vegetables.

Chunked Pork

From here, I increase the heat to start creating a crust and crisping the surfaces. This process also creates some shredding and refines the texture of the meat. It may look chewy, but, it has just a crisp surface and a melting texture in the mouth.

Ready for the Tortilla,,,or...

From here, it can easily be used for tacos or burritos, or my preference, with rice and fresh fruit. I like pairing oranges and melon with some rice, chile sauce and this meat. The fresh fruit picks up the flavors in the meat while adding a nice cooling element to the dish. Something like an acidic cole slaw would also be great, with that great acidity cutting through the fatty pork.

Tuesday, April 24, 2012

Parchment Wrapped Chicken

Today the subject of Parchment Wrapped Chicken came up, actually foil wrapped, but anybody who grew up in the San Francisco area knows that Gee Bao Gai is properly made with parchment and not foil. I decided I had nothing planned for dinner and it would be simple enough to whip up a batch of this classic of San Francisco Cantonese cookery. It was one of my favorites as a child and remains a treat for me, even if I have to cook it. Becaise I am lazy and did not want to wrap up three dozen, I ended up doing half in parchment and fried the rest.

It seems that every great culinary culture has some form of wrapped and steamed dish, the Cantonese cooking canon (hehe) has many types of these dishes. The truth is, although fried, the chicken is steamed in the packets. Here is the marinade, which is based upon a recipe from Johnny Kan's book Eight Immortal Flavors, published in 1963. This book means just a little bit more to me, as it is inscribed in my cousins handwriting "From Susie and Daddy, 1967" My cousin Susan was a stunning beauty who passed away at 26. Her dad followed a few years later. My aunt gave me this book. My recipe varies as noted.

Chicken in Parchment (Gee Bow Gai)
1/2 teaspoon vegetable oil (I use untoasted sesame oil)
1/2 teaspoon soy sauce (I use Japanese shoyu)
1 teaspoon Chinese parsley, minced (a.k.a. Cilantro)
1 teaspoon green onion
1/2 teaspoon red seasoning sauce [Hoy Sein Jeong] (Hoisin Sauce)
1 pinch salt (I used 1/8 cup Red Boat Fish Sauce instead of salt and MSG)
1 pinch monosodium glutamate

Here is where I diverge, I love the effect of ginger and garlic in Chinese cooking, this recipe really wants some of that, so I added 1 garlic clove minced and sone ginger, peeled and about 1 inch long and 1 inch thick, chopped. I also added a pinch of turbinado sugar, as it works well with the fish sauce. All of the above ingredients were placed in a bowl and muddled vigourously with a stick of wood.

Marinade ready to go

Once this was done, I used 1 cup of skinless boneless thighs, cut into one inch pieces, for the chicken. Johnny Kan used chicken filet, which I interpret as chicken breast. Thighs are cheaper. I marinaded for one hour.

Marinaded, unlike the cook

From here, pieces of parchment were cut into 2" squares, 3" squares would have worked better, the notes in the book say that. Foo! Who reads books! Anyways, I like to place a leaf of cilantro in the middle of the parchment, then the chicken then fold.

Cilantro Leaf

Chicken placed

Then folding the corner facing you up, fold the left corner in, then the right corner in, you should have something that looks like a parchment envelope, fold the top down and tuck it in. The idea is to get a nice tight sealed package. Foil is easier and looks like crap. Just my opinion. Fry in 3 to 4 inches of oil in a wok, you will want to fry in batched unless you have a large wok. I don't. Here is what you end up with.

See the nifty leaf?

The chicken is both fried and steamed, it has a unique character and due to the sealed in environment, it is also quite aromatic and intensely flavored once you open the packet. I love the texture of this method of cooking. Here is the cooks snack opened up.


Imagine these on a stainless serving dish

Chicken in Parchment!

From here, I decided I was done wrapping and decided to leverage the marinated chicken for a second dish. I took the marinaded chicken chunks, wiped them and coated with corn starch. I wanted to make a fine slurry, which was then tossed into the wok with several stems of cilantro to scent the oil. I fried in peanut oil, both for the flavor and smoke point. Here is the fried version, with a light crispy coating.

Fried!

You don't see Cantonese cooking much anymore, especially the stuff we grew up with, which was Americanized to fit the ingredients and tastes of the American market. I really enjoy this type of cooking, and the food, like all food, has that powerful effect of aroma and taste that transcends time. I love this marinade for wings as well, smoked or friend, stuffed of natural, this marinade really enhances chicken. Here is a plate of appetizers to finish off the blog.

Who needs dinner?

Saturday, April 14, 2012

I got a new Dolsot

What, you might ask is a Dolsot, well, it is a stone bowl, or pot if it has a lid, that is traditional to the Korean cultueral kitchen. Most commonly associated with Bibimbap in the U.S., it is actually an excellent pot for cooking Jjigae, Korean stews and braises. I am thrilled, as I love the effect that stone or masonrty bowls can have in cooking both on a stove or over coals. Of course, I first needed to season mine. I did this.


Brand spanking new Dolsot

The salt rub, I wet the dolsot and then scrubbed it with salt, I did this a couple of times to clear it of any dust or dirt from manufacture. You cannot, ever, use soap on a dolsot.

Salt-scrubbed Dolsot

Then I boiled it in salty water, to clear the pores and slowly heat it up for both sanitizing and prepration for seasoing. I boiled it for 30 minutes.

Mmm, boiled Dolsot

I then placed the dolcot into the oven, preheated to 350F, for 10 minutes, took it out and brushed it with sesame oil. The oil was applied twice more over a 2 hour period. I then removed it, wiped it off and back into the oven for another 30 minutes. Yes, it took a while. I have found with cast iron, doing the first seasoning slowly and thoroughly makes it a lot easier to maintain. I am assuming this is true with dolsot as well.

Ready to Cook!

I allowed it to cool to warm and wiped it down one more time. It has a nice sheen and a darker color. The feel is one of oiled stone, not gummy cooking oil. As a one time stone carver, I love that feel of oil-finished stone.

Once this was all done, I was ready to cook. I preheated the dolsot in a 400F oven. Meanwhile I prepared various items for addition to the dolsot. Cooked rice, which I added a little duck fat to. Some smoked chicken soaked in a shiitake pork broth, some shiitake mushrooms, leftover kim chi pancake, some blanched kale and some braised onion.

Smoked Chicken, Shiitake, Onion, Kimchijeon

I like to massage the kale, rather heavily, to break down the fibers, this makes the blancing go faster and I don't love the color. I don't care for the color and texture of long cooked greens as a rule, if I can find a way to shorten the cook time, I will go for that. Done right, the kale can actually be eaten raw or pickled in slaw this way.

Yep, it is tender, and that green

Pretty much from here, it is all about assembly. I oiled the dolsot interior with a quick brushing of sesame oil. I had some hot rice, in this case short-grained Korean rice, which I mixed in a little duck fat and shiitake and pork broth into. This was lightly pressed into the hot dolsot. Then ingredients were assembled on the rice.

Lidded and back into the oven for a few minutes. Everything was already cooked and just needed to heat through and give the rice a chance to crisp on the bottom. Ijust took a guess and removed it after about 15 minutes, which was not quite long enough.

Done and cooked, ready to mix

De-lidded and mixed to make sure the crispy crust of rice is blended into the mix of meat and vegetables, then served. The timing was not quite right, didn't quite get the crispy crust I was hoping for, just bits and pieces of it. Next time for sure, the great thing though, the texture of all the ingredients was terrific and I can see where it can be used in the live fire cookers as well.

Mixed and Served

Oh, an ale made the trip to the table as well, I brewed a Antwerpen clone ale from a recipe given to me by a friend that works out great. The head poured a little too deep, I had to spoon a little off to finsih the pour. What a great head retention and flavor recipe.

Anterpen Ale

Pork and Shiitake Broth:
1/8 cup shoyu (Japanese soy sauce)
1/8 cup Red Boat Fish Sauce
4 dried shiitake mushrooms
5 thin slices of ginger
1 clove garlic
1 teaspoon turbinado sugar
1/2 cup pork broth
1/2 cup water

Bring all liquid ingredients to boil reduce heat and simmer shiitake until just soft. Remove from broth. Add onions and simmer until just soft, not fully translucent. Remove and add giner and 1 clove garlic. Remove after 10 minutes. Reduce at a boil until reduced by half of original volume. This broth is salthy, sweet and loaded with umami, it is a great accent to many foods.

Wednesday, April 11, 2012

Smoked Rib Soup

A few days ago I decided to make some ribs in my drum smoker, the ribs were trimmed from Spareribs to St. Louis style, which left me with the rib tips. Traditional U.S. style would dictate that these rib tips would be smoked and used as appetizers or "cook's treats". But, I don't happen to enjoy rib tips in this way, so I decided to make them into a pork stock. Eventually, I was going to shoot for making Xiao long bau, that hasn't happened yet. I did make noodle soup though.

Left-over Smoked Ribs

Pork Broth:
4 quarts of water
rib tips from one rack of spareribs
1-1/2" ginger, split in half
3 cloves garlic, lightly crushed
2 star anise
8 Phu Quoc peppercorns, black
6 whole cloves
1 2" length of cinnamon stick

Bring all ingredients to a low simmer, the idea is to have almost no bubbles and to very slowly steep the ingredients to create a clean, clear broth. The steep runs about 180F and goes for around 4 hours. This is filtered, cooled and skimmed. You'll notice there is not a lot of salt, this allows me to control the salt later in the cook and gives me flexibility later in the cook.

Noodle Dough before rest

Not Hand-pulled Noodles

Noodles:
3/4 cup bread flour
1/4 cup all-purpose whole wheat flour
1/4 cup very hot water
2 tablespoons neutral oil

Sift flours together to blend, place in bowl of blender with paddle attachment. Mix hot water and oil together and slowly add to flour as mixer is running on low speed. The dough will start to come together as you add water. Only add enough water to make the dough into a rough loose dough. Remove and knead for 5 to 7 minutes by hand. Wrap dough in plastic wrap tightly and allow to rest for at least an hour. These will be Lamian-style noodles except I don't hand pull them. I use a pasta roller, after a couple of minutes of kneading to refresh the gluten, I roll it three times through a flat pasta roller, then use the spaghetti cutter to form the noodles. Then into boiling salty water for 2 to 3 minutes.

The Soup:
4 left-over ribs
4 cups prok broth
1 cup water
1/4 cup Red Boat fish sauce
2 fresh shiitake mushrooms sliced
green onions, cilantro to taste

This is a very simple soup, I simply simmered the ribs until the meat came off the bone, the mushrooms were added to cook, about 5 minutes before serving, I add the fish sauce. The green onions and cilantro are added just a minute or two before serving. Here is also where the lack of use of sugars and salts in the preparation of the broth comes in. I use Red Boat and call it out by brand for a spefic reason, it has no added sugars or preservatives, I believe it has a distinct flavor that is salty, sweet and pungent. Adding it is an easy cheat to add a dimension of dashi, a subtle sweetness and a taste of the sea.

Green onions, Cilantro and Shiitake

Pork Rib Soup, dark rich broth

Once the noodles have been boiled, the whole process goes pretty fast. The noodles need to go from boiling water to very hot soup, the herbal component should have just gone in as well. Since the noodles are fresh, they can overcook in a flash. 3 minutes might be just right, 3.5 minutes could well be mush. This makes a welcome and familiar dish for most anyone, but, particularly for anyone who grew up in an Asian family. Quick and simple.

Noodle Soup

Although the noodles add a great dimension of texture and help carry the flavor, as with all soups, the real deal is found in the broth, the pork broth I used as a base for the soup, along with all of the aromatics, really brings the flavor to this dish. The smoke and spice from the ribs, although not at all Chinese or Japanese in origin, really adds depth and complexity to the dish.

Look at that shine

Look at that shine, the use of the collagen rich rib tips really adds to the mouth feel of the stock, the addition of the herbs and fish sauce really enhances the highlight flavors of the broth. This soup really highlights the idea of a simple dish elevated with layers of flavors.